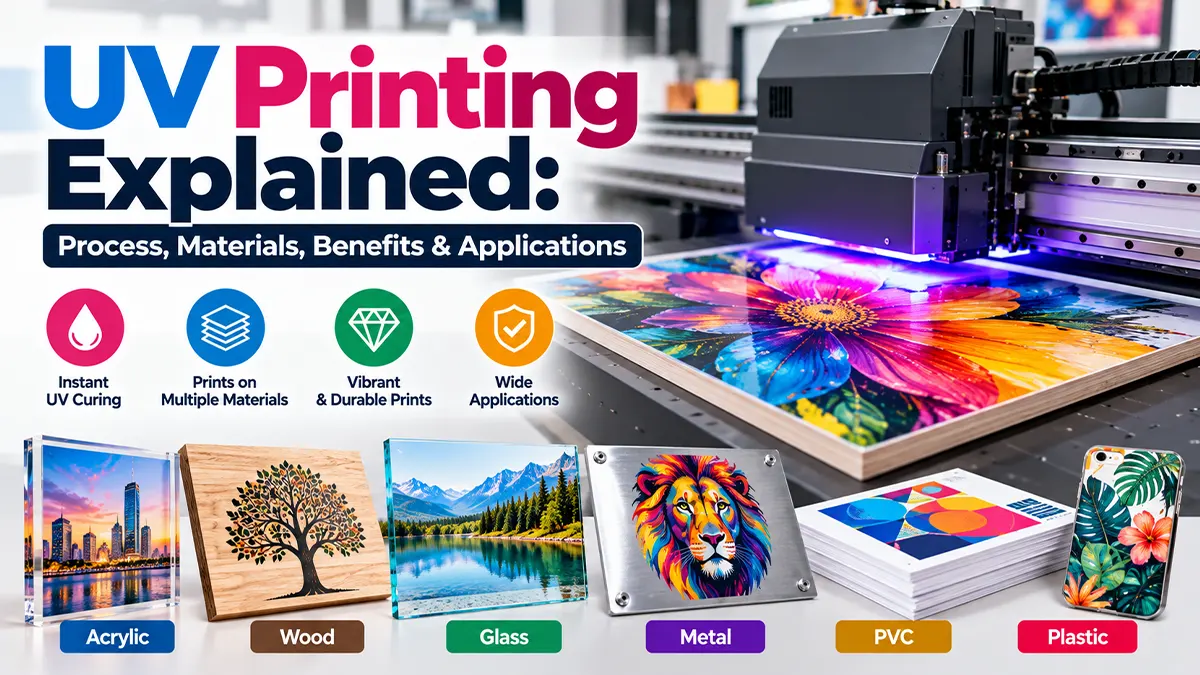
Quick Answer
UV printing is a digital inkjet process that places UV-curable ink onto a substrate and uses ultraviolet light to cure it rapidly. Because curing occurs during printing, the output can often be handled immediately. The technology is especially useful when a project needs direct printing on rigid or specialty materials, short-run customization, white ink or selected decorative effects. Material compatibility still needs to be tested because adhesion and durability depend on the substrate, ink system and surface preparation. Fujifilm's 2026 guide describes UV-curable inks as a technology used across graphics, labels, packaging, product decoration and industrial manufacturing.
What Is UV Printing?
UV printing, also called UV-curing printing, is a form of digital printing in which specially formulated ink is deposited onto a surface and exposed to ultraviolet energy. The UV exposure triggers a chemical curing reaction that rapidly changes the liquid ink into a solid film.
Unlike conventional ink systems that may rely on evaporation, absorption or extended drying, UV-curable ink is designed to cure when it receives the required ultraviolet energy. This allows printed material to move quickly to inspection, cutting, finishing or packaging.
UV printing is not limited to one machine format. UV technology is used in digital inkjet equipment and can also be found in other printing processes. In digital commercial and signage work, flatbed, hybrid and roll-to-roll configurations are common depending on the substrate and production requirement.
How Does UV Printing Work?
The basic workflow combines digital artwork preparation, ink deposition, UV exposure and finishing. The exact machine sequence varies, but the core principle is consistent: ink is deposited, then rapidly cured with UV energy.
1. Prepare the artwork
Artwork is processed through the printer or RIP workflow. Colour channels, resolution, print passes and any white-ink or varnish layers are prepared according to the equipment and job requirements.
2. Prepare and position the substrate
The material is cleaned, positioned and secured. Flat, stable substrates generally provide more predictable registration. Some materials may require a primer or other surface treatment to improve adhesion.
3. Deposit UV ink
Inkjet printheads place very small droplets of UV-curable ink onto the substrate. The printer controls droplet placement, colour channels and print passes to build the image.
4. Cure with ultraviolet light
UV lamps or UV-LED systems expose the deposited ink to ultraviolet energy. Photoinitiators in the ink respond to the UV energy and initiate polymerisation, rapidly forming a solid printed layer.
5. Inspect and finish
After curing, the output can be checked for colour, sharpness, adhesion and surface quality. Depending on the application, it may then be cut, assembled, laminated or otherwise finished.
Fujifilm explains that UV-curable inks can move directly into downstream processes such as cutting, laminating, folding or packaging after curing.
UV-Curing Technology: What Happens to the Ink?
UV-curable ink contains components designed to react when exposed to ultraviolet energy. Typical formulations can include pigments, monomers, oligomers, photoinitiators and additives. The exact formulation varies by manufacturer and intended application.
Photoinitiators absorb UV energy and help initiate the reaction that transforms the liquid ink into a solid polymer network. The resulting film can provide useful mechanical and chemical properties, but the final performance depends on the complete ink-and-substrate system.
Modern systems may use mercury-arc lamps or UV-LED curing technology. UV-LED systems are widely used in contemporary equipment, while the appropriate curing configuration depends on the machine, ink chemistry and production requirements.
What Materials Can UV Printers Print On?
One of UV printing's main attractions is the range of substrates that can be compatible with the technology. Since the ink is cured on the surface, the process can work with many non-porous or rigid materials that are difficult for some conventional ink systems.
| Material | Common Uses | Important Consideration |
|---|---|---|
| Acrylic | Signs, displays, panels, décor | Check adhesion, surface cleanliness and ink compatibility. |
| PVC / foam board | Displays, boards, indoor signage | Use a print profile and curing setup suited to the material. |
| Glass | Décor, panels, displays, product decoration | Non-porous surface; pretreatment may be needed. |
| Metal | Panels, labels, product parts, industrial decoration | Surface preparation and adhesion testing are important. |
| Wood / MDF | Décor, plaques, displays, customized products | Surface texture and coating can affect the finished result. |
| Plastic | Phone cases, product parts, promotional goods | Plastic type and surface energy affect adhesion. |
| Paper & board | Packaging, cards, specialty print | Choose a compatible ink and finishing workflow. |
| Ceramic / tile | Decorative panels, tiles, product decoration | Test adhesion and intended-use durability. |
| Leather / flexible media | Selected product decoration | Use an ink system designed for flexibility where required. |
Manufacturer documentation confirms that UV-curable systems can be used on non-absorbent materials such as plastic, glass and metal, while specialised inks may be designed for rigid or flexible applications.
Flatbed, Hybrid and Roll-to-Roll UV Printing
The printer configuration determines the kinds of materials and products that can be handled.
Flatbed UV
Rigid sheets or objects are placed directly on a flat printing bed. This format is useful for acrylic, boards, wood, metal, glass and other rigid substrates supported by the machine.
Hybrid UV
Hybrid systems can combine rigid-board handling with roll-fed media, making them useful for businesses that need both sheet and flexible-media production.
Roll-to-Roll UV
Roll-fed equipment is designed for flexible media such as selected films, vinyl, wallpaper, canvas and other supported roll materials.
White Ink and Varnish in UV Printing
Some UV printers support additional ink channels beyond CMYK. Two common examples are white ink and clear varnish.
- White ink: useful for dark or transparent substrates and for creating an opaque base beneath colour.
- Varnish: can create selected gloss, highlight, texture or decorative effects when supported by the printer.
- Layered printing: some workflows build multiple ink layers to increase opacity or create raised visual effects.
These capabilities are machine- and ink-dependent, so a printer specification should be checked before promising a particular effect. Current UV systems from manufacturers such as Mimaki and other equipment providers offer different ink configurations for different applications.
Benefits of UV Printing
Rapid curing
The ink is cured during printing, reducing the waiting period associated with conventional drying.
Broad substrate options
UV systems can support many rigid and specialty substrates when the ink and machine are designed for them.
Direct-to-substrate printing
Compatible machines can print directly onto selected objects and rigid panels without a separate transfer step.
Special-effect capability
White ink, varnish and layered printing can add options beyond standard CMYK output on supported equipment.
Short-run customization
As a digital process, UV printing can be practical for customized products and on-demand work where traditional setup would be less convenient.
Immediate handling
Because the ink cures quickly, many outputs can move directly to inspection or finishing after printing.
Limitations and Practical Considerations
- Adhesion varies: UV ink does not automatically adhere equally well to every material.
- Surface preparation matters: cleaning, priming or other treatment may be needed for some substrates.
- Material testing is important: a sample print can reveal adhesion, colour and durability issues before production.
- Equipment configuration differs: not every UV printer supports white ink, varnish, flexible media or direct-to-object work.
- Flexibility depends on ink: rigid inks may not be suitable for substrates that bend or stretch.
- Application conditions matter: indoor, outdoor, chemical, abrasion and handling requirements can change the suitable ink and substrate combination.
Mimaki notes that surface type and pretreatment can significantly affect UV-ink adhesion.
UV Printing Applications
| Application | Examples | Why UV Printing Can Fit |
|---|---|---|
| Signage & displays | Acrylic signs, rigid panels, POS displays | Direct printing and support for rigid substrates |
| Product decoration | Phone cases, bottles, promotional products | Customization and direct-to-object capability on compatible systems |
| Packaging | Labels, cartons, specialty packaging | Fast curing and support for selected packaging substrates |
| Interior décor | Wood panels, glass, decorative boards | Ability to print graphics directly onto rigid surfaces |
| Industrial decoration | Components, panels, equipment parts | Durable marking and controlled digital production |
| Labels & identification | Product labels and durable identifiers | Fast curing and compatibility with selected films and materials |
Fujifilm describes UV inkjet technology across graphic display, labels, packaging, product decoration and industrial manufacturing.
UV Printing vs Conventional Printing
| Factor | UV Printing | Conventional Ink Systems |
|---|---|---|
| Curing / drying | UV curing during printing | May rely on absorption, evaporation, heat or extended drying depending on the ink |
| Substrate range | Often broad, including many rigid/non-porous surfaces | Depends strongly on the specific ink and printing process |
| Direct-to-object | Available on compatible machines | Depends on process and product |
| Special effects | White ink, varnish and layered effects on supported systems | Varies by technology |
| Immediate handling | Usually possible after curing | May require drying or curing time |
This is a technology comparison, not a universal rule. The correct method depends on the substrate, quantity, finish, durability requirements, equipment and production workflow.
How to Prepare a File for UV Printing
- Confirm the exact finished size and printable area.
- Use the colour workflow requested by the print provider.
- Keep important text and logos in vector format where practical.
- Use sufficiently high-resolution raster images for the final viewing distance and output size.
- Prepare separate layers or spot channels for white ink or varnish if the printer requires them.
- Check transparency, overprint and knockout settings.
- Confirm bleed, cut lines and finishing requirements before export.
- Ask for a proof or sample when colour, adhesion or special effects are critical.
A Practical UV Printing Workflow for a New Project
Step 1: Define the product
Identify the substrate, size, shape, quantity, viewing conditions and intended use.
Step 2: Confirm material compatibility
Ask the printer whether the exact material has been tested with its ink system. Do not assume two similar-looking plastics or coatings will behave identically.
Step 3: Decide on finish
Determine whether you need standard CMYK, white ink, varnish, layered printing or a special texture.
Step 4: Approve a sample
For new substrates or high-value products, test adhesion, colour, scratch resistance and the visual finish before the full run.
Step 5: Finalize production
Once the sample is approved, confirm artwork, quantity, finishing, packaging and delivery requirements.
Common UV Printing Mistakes
Skipping adhesion tests
A print that looks good immediately may still fail the intended handling or exposure requirement if adhesion is poor.
Using the wrong ink for flexibility
Rigid and flexible applications may require different ink characteristics.
Ignoring surface preparation
Dust, oils, coatings and low-surface-energy materials can affect print adhesion.
Assuming every UV printer is the same
Ink channels, curing systems, media handling and supported materials vary by machine.
Overpromising outdoor durability
Outdoor life depends on ink, substrate, exposure, finishing and environmental conditions.
Skipping a proof for special effects
White ink, varnish and layered effects can look different from a standard screen preview.
UV Printing Checklist
- ☐ Exact substrate and coating identified
- ☐ Printer and ink compatibility confirmed
- ☐ Surface cleaning or primer requirements confirmed
- ☐ Final artwork size and resolution checked
- ☐ White ink / varnish layers prepared if required
- ☐ Sample or proof approved for critical jobs
- ☐ Durability requirement defined
- ☐ Finishing and installation requirements confirmed
Sources & Further Reading
Disclaimer
UV printing performance varies by printer, ink formulation, substrate, surface preparation, curing system and intended use. The information in this article is for general educational purposes. Always confirm material compatibility and conduct appropriate testing with the print provider before production.
Planning a UV Printing Project?
Share your substrate, product size, quantity and desired finish to discuss suitable UV printing options and artwork requirements.
Discuss a Project